
前言
在迁移AquaDX到K8s集群中的时候,我需要给别人远程访问的权限
我的服务器是不公开的 我并不打算公开出去给所有人用
之前用的ZeroTier因为几个原因我决定废弃了:
- 他把路由选项从控制面板中删除了,改为要付费的
- 他要修改宿主机的tun配置来实现二层上的网络代理,这在K8s中是不允许的
- 打洞策略太迷 即使能UPnP直连或者IPv6直连有时候他还是中转
第一点导致我没法用来代理整个网段了,以前我把他装在OpenWrt上,这样我可以连接上网络之后访问我整个局域网,现在没了
第二点则是他的硬伤,或许我们有方法让他不修改tun,但显然没必要
我们可以选择性能更高的三层网络方案,基于WireGuard的一大堆都可以
我看到了Github上的这个:https://github.com/HarvsG/WireGuardMeshes/blob/main/readme.md
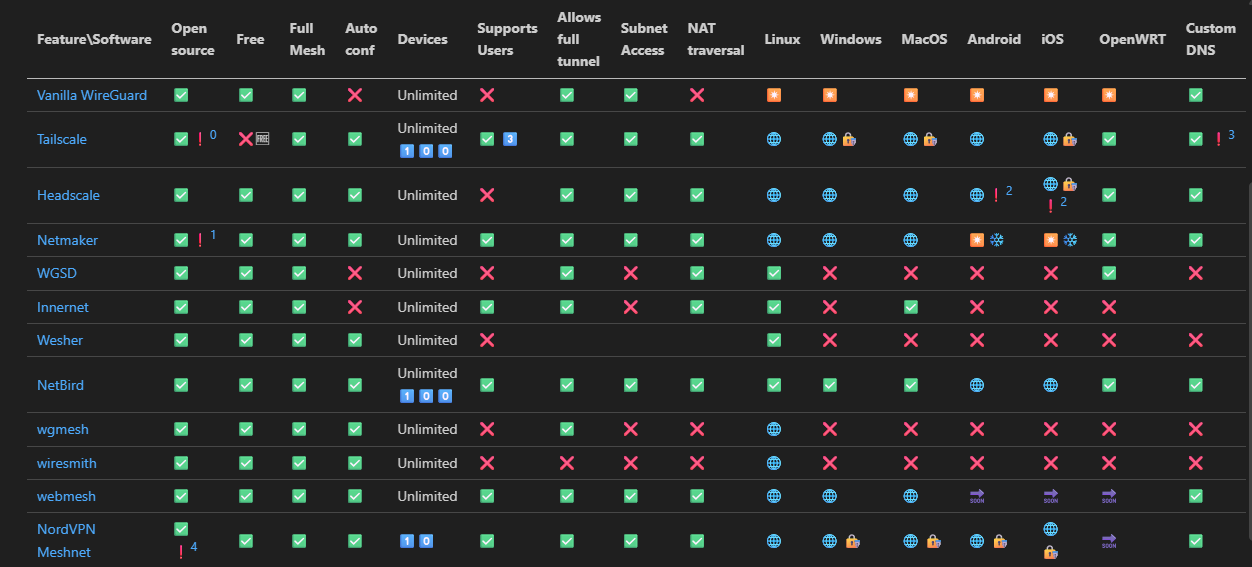
可以看到最成熟的应该是NetBird和Tailscale
我在之前是使用过Tailscale的,也确实很成熟
NetBird也不差
考虑到我用过Tailscale,我决定还是用他
但是Tailscale打洞中转延迟非常高,因为国内没有服务器
那么有没有最夯的方式呢
自建Headscale
我其实想过自建Netbird,但我一打开Netbird那网站和Tailscale也差不多嘛
上面那个图的HeadScale其实就是Tailscale控制平面的开源实现
TailScale客户端是开源的,控制端则闭源 和Zerotier一样
事实上的话我们可以自己搭建中继节点,然后用Tailscale官方的功能就完全足够了
但是都要自己搭了我干嘛不把控制平面也自己弄了呢()顺便解锁一些收费才能用的功能
也能同时解决打不了洞难中转的问题
其实的话不难,Headscale麻烦的是那个config
---
apiVersion: apps/v1
kind: Deployment
metadata:
annotations: {}
labels:
app: headscale
k8s.kuboard.cn/name: headscale
name: headscale
namespace: headscale
spec:
replicas: 1
selector:
matchLabels:
app: headscale
labels:
app: headscale
spec:
containers:
- command:
- headscale
- serve
image: 'docker.io/headscale/headscale:stable'
imagePullPolicy: IfNotPresent
name: headscale
ports:
- containerPort: 8080
name: web
protocol: TCP
- containerPort: 9090
name: metrics
protocol: TCP
- containerPort: 50443
name: grpc
protocol: TCP
volumeMounts:
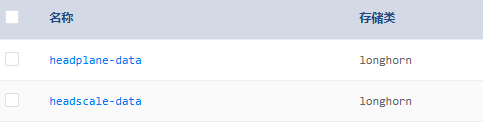
- mountPath: /var/lib/headscale
name: headscale-data
- mountPath: /var/run/headscale
name: headscale-data
- mountPath: /etc/headscale
name: config
readOnly: true
volumes:
- name: headscale-data
persistentVolumeClaim:
claimName: headscale-data
- configMap:
defaultMode: 420
items:
- key: server-config.yaml
path: config.yml
name: server-config.yaml
name: config
---
apiVersion: v1
kind: Service
metadata:
annotations:
metallb.io/ip-allocated-from-pool: default-address-pool
labels:
app: headscale
k8s.kuboard.cn/name: headscale
name: headscale
namespace: headscale
spec:
allocateLoadBalancerNodePorts: true
clusterIP: 10.110.187.183
clusterIPs:
- 10.110.187.183
externalTrafficPolicy: Cluster
internalTrafficPolicy: Cluster
ipFamilies:
- IPv4
ipFamilyPolicy: SingleStack
ports:
- name: web
nodePort: 30667
port: 8080
protocol: TCP
targetPort: 8080
- name: metrics
nodePort: 32383
port: 9090
protocol: TCP
targetPort: 9090
- name: grpc
nodePort: 32594
port: 50443
protocol: TCP
targetPort: 50443
selector:
app: headscale
sessionAffinity: None
type: LoadBalancer
status:
loadBalancer:
ingress:
- ip: 10.0.100.11
ipMode: VIP
然后的话是config
server_url: http://127.0.0.1:8080
listen_addr: 0.0.0.0:8080
metrics_listen_addr: 0.0.0.0:9090
grpc_listen_addr: 0.0.0.0:50443
grpc_allow_insecure: true
noise:
private_key_path: /var/lib/headscale/noise_private.key
prefixes:
v4: 100.64.0.0/10
v6: fd7a:115c:a1e0::/48
allocation: sequential
derp:
server:
enabled: false
urls:
- https://controlplane.tailscale.com/derpmap/default
auto_update_enabled: true
update_frequency: 3h
disable_check_updates: false
ephemeral_node_inactivity_timeout: 30m
database:
type: sqlite
sqlite:
path: /var/lib/headscale/db.sqlite
write_ahead_log: true
wal_autocheckpoint: 1000
acme_url: https://acme-v02.api.letsencrypt.org/directory
tls_letsencrypt_cache_dir: /var/lib/headscale/cache
tls_cert_path: ""
tls_key_path: ""
log:
level: info
format: text
policy:
mode: file
path: ""
dns:
magic_dns: true
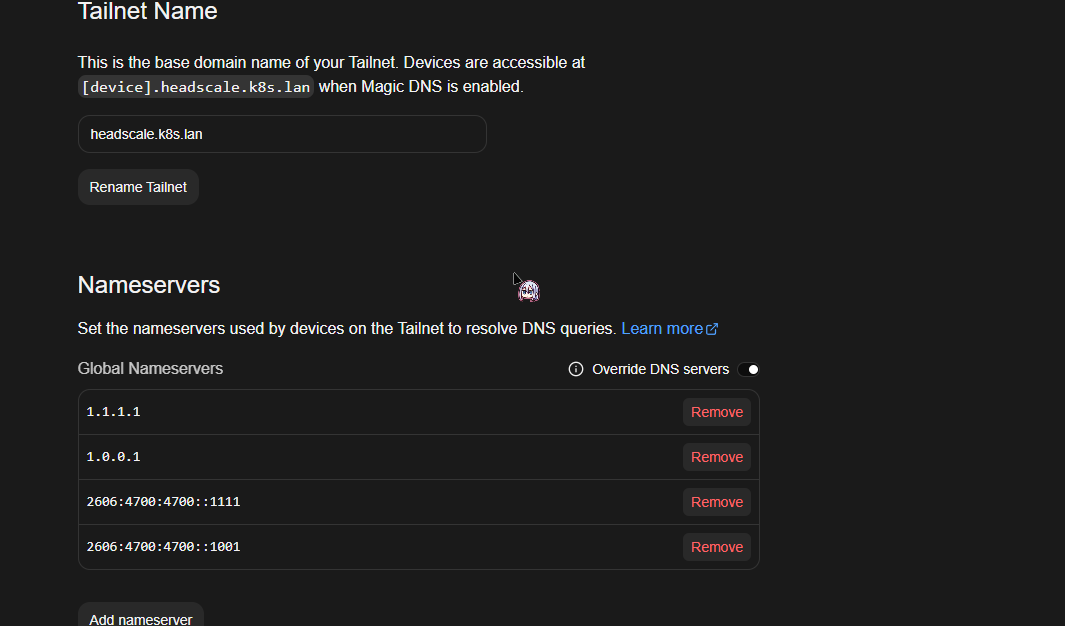
base_domain: headscale.lan
override_local_dns: true
nameservers:
global:
- 1.1.1.1
- 8.8.8.8
split: {}
search_domains: []
extra_records: []
unix_socket: /var/run/headscale/headscale.sock
unix_socket_permission: "0770"
logtail:
enabled: false
randomize_client_port: false
不出意外就没问题了,但是Headscale没有GUI,搭起来之后我们得用CLI访问
这行吗 这肯定不行啊
我们可以参考Headscale的官方界面选一个GUI
https://headscale.net/stable/ref/integration/web-ui/
我选了一下有四个
https://github.com/simcu/headscale-ui
https://github.com/tale/headplane
https://github.com/GoodiesHQ/headscale-admin
https://github.com/rickli-cloud/headscale-console
根据自己对UI的喜好选一个就好
最后我根据Star数和更新频率决定选择headplane
他的UI也是仿造的Tailscale 把人饭碗抢光光了
也好,熟悉Tailscale可以直接上手
去看一下这玩意还支持反代,SSO,SSH key 完美
看了一下为了Headplane能管理,最好的方式是把他们跑在一起
我一开始想的是给他们挂在同一个Deployment下 使用两个工作容器
其实没必要,分开也是完全可以的
因为我把headscale和headplane看混好几次
这他妈也太像了吧
为了便于区分,之后Headscale简称Scale,Headplane简称Plane
不管怎么说,我们先把他分开部署
请把Plane和Scale放在同一个Deployment中,详情看后面就知道了😄
---
apiVersion: apps/v1
kind: Deployment
metadata:
labels:
k8s.kuboard.cn/name: plane
name: plane
namespace: headscale
spec:
progressDeadlineSeconds: 600
replicas: 1
revisionHistoryLimit: 2
selector:
matchLabels:
k8s.kuboard.cn/name: plane
template:
metadata:
labels:
k8s.kuboard.cn/name: plane
spec:
containers:
- image: 'ghcr.io/tale/headplane:latest'
imagePullPolicy: IfNotPresent
name: headplane
ports:
- containerPort: 3000
name: web
protocol: TCP
volumeMounts:
- mountPath: /etc/headplane
name: config
- mountPath: /var/lib/headplane
name: data
- mountPath: /etc/headscale
name: scale-config
readOnly: true
volumes:
- configMap:
items:
- key: config.yml
path: config.yaml
name: plane-config
name: config
- name: data
persistentVolumeClaim:
claimName: headplane-data
- configMap:
items:
- key: server-config.yaml
path: config.yaml
name: server-config.yaml
name: scale-config
---
apiVersion: v1
kind: Service
metadata:
annotations: {}
labels:
k8s.kuboard.cn/name: plane
name: plane
namespace: headscale
ports:
- name: web
port: 3000
protocol: TCP
targetPort: 3000
selector:
k8s.kuboard.cn/name: plane
sessionAffinity: None
type: ClusterIP
---
apiVersion: networking.k8s.io/v1
kind: Ingress
metadata:
annotations: {}
labels:
k8s.kuboard.cn/name: plane
name: plane
namespace: headscale
spec:
ingressClassName: nginx-ingress
rules:
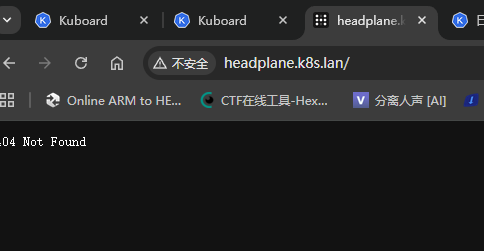
- host: headplane.k8s.lan
http:
paths:
- backend:
service:
name: plane
port:
number: 3000
path: /
pathType: Prefix
然后还有Config
    server:
      host: "0.0.0.0"
      port: 3000
      cookie_secret: "$(openssl rand -hex 16)一个在这里"
      cookie_secure: false # 不改的话不是https不会发送Cookie
      data_path: "/var/lib/headplane"
    headscale:
      url: "http://headscale.headscale.svc.cluster.local"
      config_path: "/etc/headscale/config.yaml"
      config_strict: true
    integration:
      agent:
        enabled: false
        pre_authkey: "<your-preauth-key>"
      docker:
        enabled: false
        container_label: "me.tale.headplane.target=headscale"
        socket: "unix:///var/run/docker.sock"
      kubernetes:
        enabled: true
        validate_manifest: true
        pod_name: "headscale"

      proc:
        enabled: false
我这里把OIDC段删了,我们先跑起来再去配置
然后就报错了
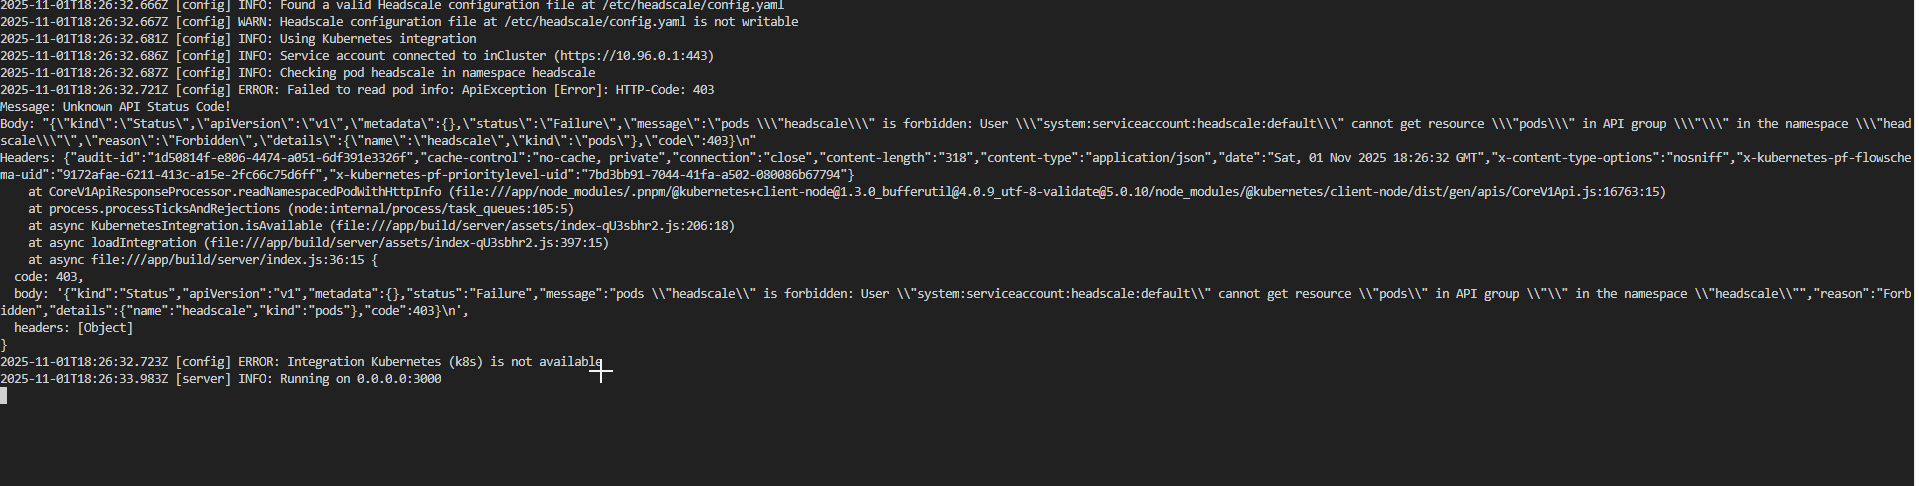
傻逼了 因为我们设置了kubernetes integration
简单来说就是可以让Plane自动发现集群中的Scale服务,自动通信
我们现在需要设置一下Service Account,默认的default是没有任何权限的
我们需要让plane可以查看访问同命名空间下的pod
---
apiVersion: v1
kind: ServiceAccount
metadata:
  name: headplane
  namespace: headscale

---

apiVersion: rbac.authorization.k8s.io/v1
kind: Role
metadata:
  name: headplane-role
  namespace: headscale
rules:
  - apiGroups: [""]
    resources: ["pods"]
    verbs: ["get", "list", "watch"]

---
apiVersion: rbac.authorization.k8s.io/v1
kind: Role
metadata:
  name: headplane-role
  namespace: headscale
rules:
  - apiGroups: [""]
    resources: ["pods"]
    verbs: ["get", "list", "watch"]
然后修改一下Plane让他使用这个ServiceAccount

重启一下

尼玛。

我想到Pod名字是随机的,我们在Config里填的
kubernetes:
        enabled: true
        validate_manifest: true
        pod_name: "headscale"
他其实还有一行注释在上面:
kubernetes:
        enabled: true
        validate_manifest: true
    # This should be the name of the Pod running Headscale and Headplane.
    # If this isn't static you should be using the Kubernetes Downward API
    # to set this value (refer to docs/Integrated-Mode.md for more info).
        pod_name: "headscale"
我去看看他的文档先:

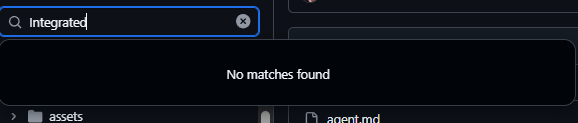
?你这个文档在哪呢
反正说白了就是,Pod名字是会变动的,我们可以用Downward API去解决这个问题
等一下 席巴了 通过这个注入podname需要同一个Deployment

我真是草了
其实也不用说非得注入,我们可以把Scale改成StatefulSet,这样他的名字就是固定的了
其实的话integration是可以false的,我们在上面已经通过集群内域名实现Plane对Scale的访问了
但我已经折腾到这了 给他一起配上吧
把Plane也放到同一个Deployment里作为另一个工作容器
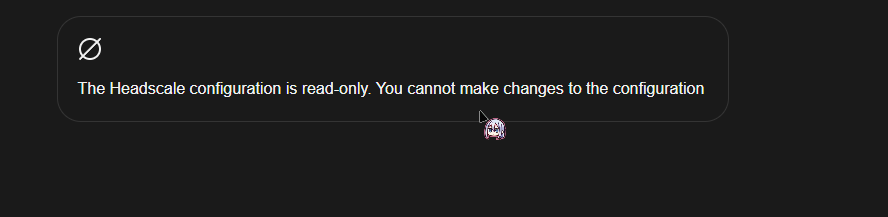
等一下啊 configmap是只读的
那怎么让Plane修改config
我真红了 我写到这已经边折腾边写3小时了 直接用Tailscale的话Sidecar都跑起来收工了
卧槽我们跑起来还要跑Sidecar呢

没话说了 折腾到这我已经有点沉默了 我们先不管integration 先看看能不能用

欸等一下
给自己折腾傻了,Plane的默认界面是/admin

白浪费一个小时去来回调,先用Service访问不香吗(
那我们进headscale容器生成一个key先
这headscale容易默认啥shell都没有
我们还得去master节点exec一下

忘记指定命名空间了 真玩傻了
kubectl exec -n headscale -it headscale-59bd5c7d65-8j5k6 -- headscale apikeys create
然后就可以进到管理界面了
那就剩一个小问题
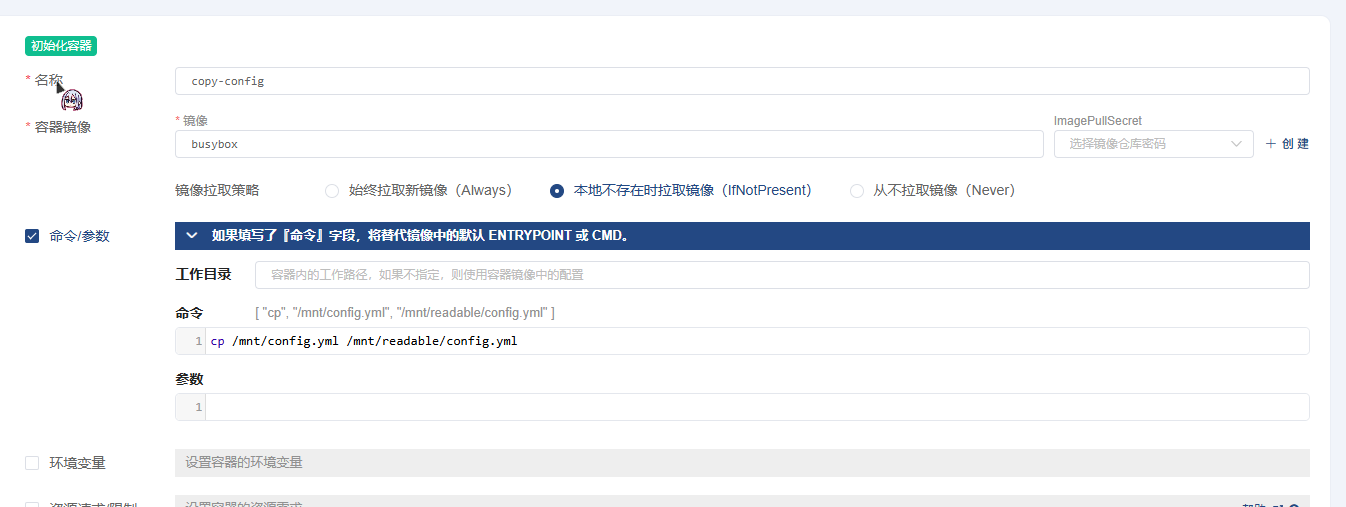
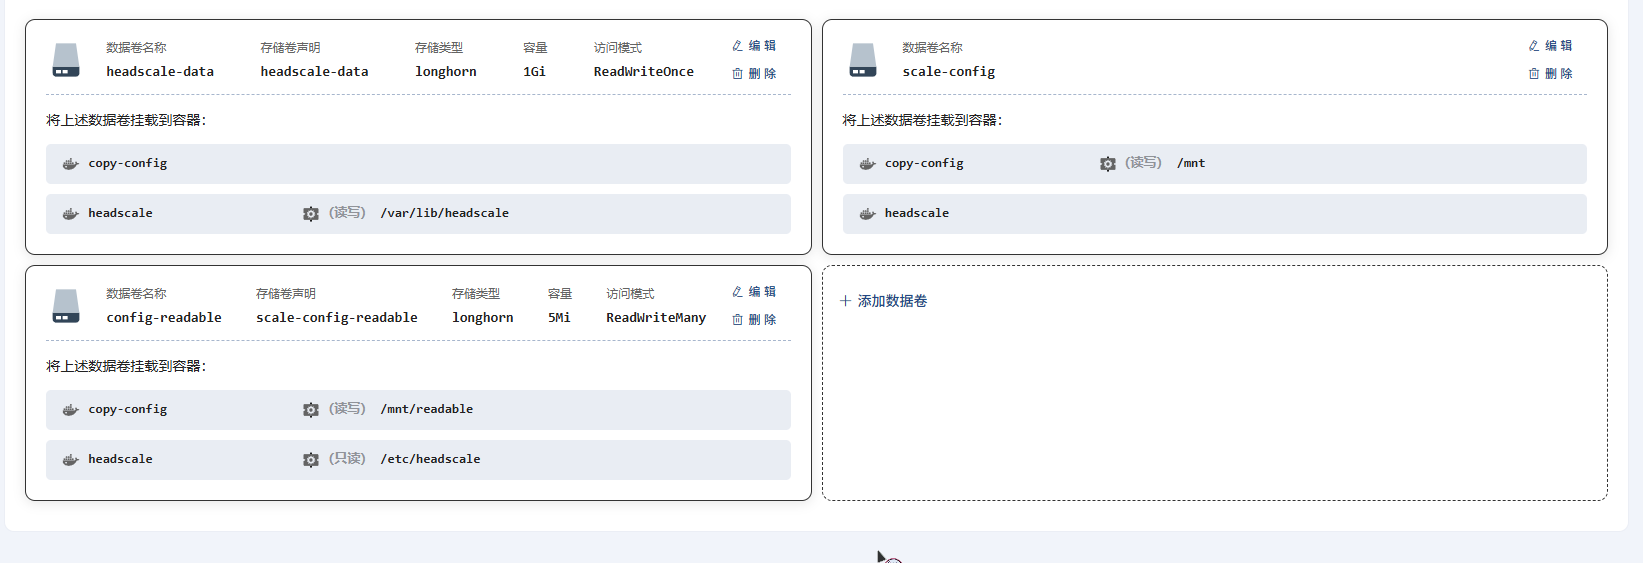
我们得把Configmap拷贝到PVC中并允许多节点同时读写
我选择用一个init pod自动拷贝,这样就能解决问题了
然后就在这时候


卧槽Worker炸了
真是坎坎又坷坷啊
我一看 普罗米修斯在我的Worker里给人类偷取火种去了

西巴了搞个wg组网搞一晚上
我先把Grafana监控套件全删了
这个是题外话 修好之后就可以正常使用headplane了
写了500多行了 终于完事了
那我们就顺便配置下OIDC吧
只需要在Plane的下面加上这些就好了
Scale同理,这样的话登录的时候就不用去手动输入Machine key,过OIDC就好了
oidc:
  issuer: "https://example.com/application/o/headplane-oidc/"
  client_id: "secret"
  client_secret: "secret"
  scope: "openid email profile"
  disable_api_key_login: true
  token_endpoint_auth_method: "client_secret_post"
  headscale_api_key: "api key"
  redirect_uri: "https://example.com/admin/oidc/callback"
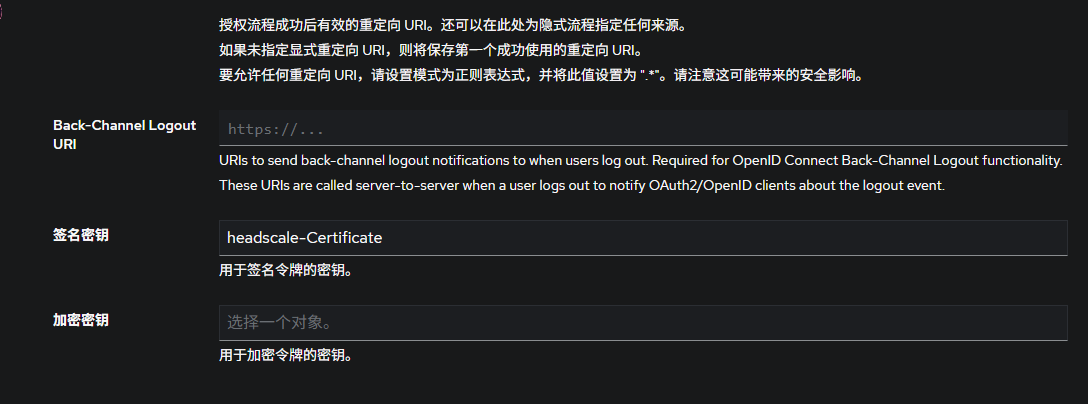
Authentik上的话,别的都和正常创建OIDC一样,最关键的是要选择一个签名证书,并且是RS256加密的
这样的话就可以实现加入网络和管理都用同一套帐号了
完事 接下来是Sidecar 太长了我决定放到另一篇